
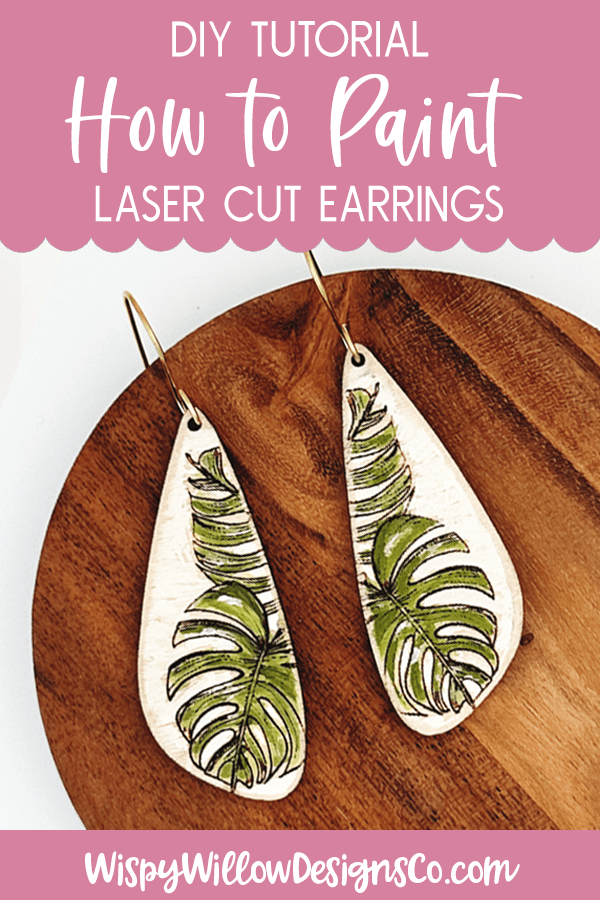
How To Paint Engraved Laser Cut Earrings
The links contained in this blog post may be affiliate links. I may receive a small commission for the referral but there is no additional cost to you.
Turn your laser cut Monstera earrings into tiny works of art! 🎨✨
Here's a quick video on my absolute favorite way to easily finish laser cut and engraved earrings
Supply Recommendations:
- Laser Cut Earring SVG Design Files from Wispy Willow Designs
- Glowforge Laser Cutter - Save up to $500: https://glowforge.us/r/ZOJACUMW
- xTool P2 Laser Cutter - Save $250!
- My favorite gaffer tape for easily removing masking: https://amzn.to/3ti6kuh
- My favorite masking tape for wood: https://amzn.to/3RI2CUA
- Arteza Acylic Paint - I love the tones in this set. https://amzn.to/3PGBbID
- My favorite chalk paint: Folk Art Sheepskin: https://amzn.to/3tgI4bI
- The best paint brushes: https://amzn.to/3rDBbkn
- Sanding blocks: https://amzn.to/3rxI2Md
- Canned Air to spray off any debris in engraving: https://amzn.to/3ZGA9k5
- I also frequently use a dremel or electric nail file on the sides of the earrings to give them more definition: https://amzn.to/3PY1paD
Here's the Laser Cut Earring File I used:
Or grab this laser cut earring file for FREE to perfect your techique!

And check out these popular laser cut earring files
The Basics
- Engrave and Laser Cut your earrings - I recommend maple wood with an MDF core.
- Add your colored paints. I use cheap acrylic paints. I add water to my paints to make them transparent and easier to layer.
- Layer your colors for a realistic shading look.
- Add white chalk paint in a light streaky fashion.
- Use a dremel to smooth the top edges of the laser cut earring.
- Use a high grit sanding block to lightly smooth the surface of the earring.
- Blow any dust away.
- Seal with a clear coat spray (optional- honestly I wear earrings both with and without top coat and they have all held up beautifully.)
- Add your laser cut earring hardware and wear with pride!

Let me know if you have any questions about laser cut earrings!
I'd love to see what you make in my Facebook Group.


Check out these popular blogs


Leave a comment